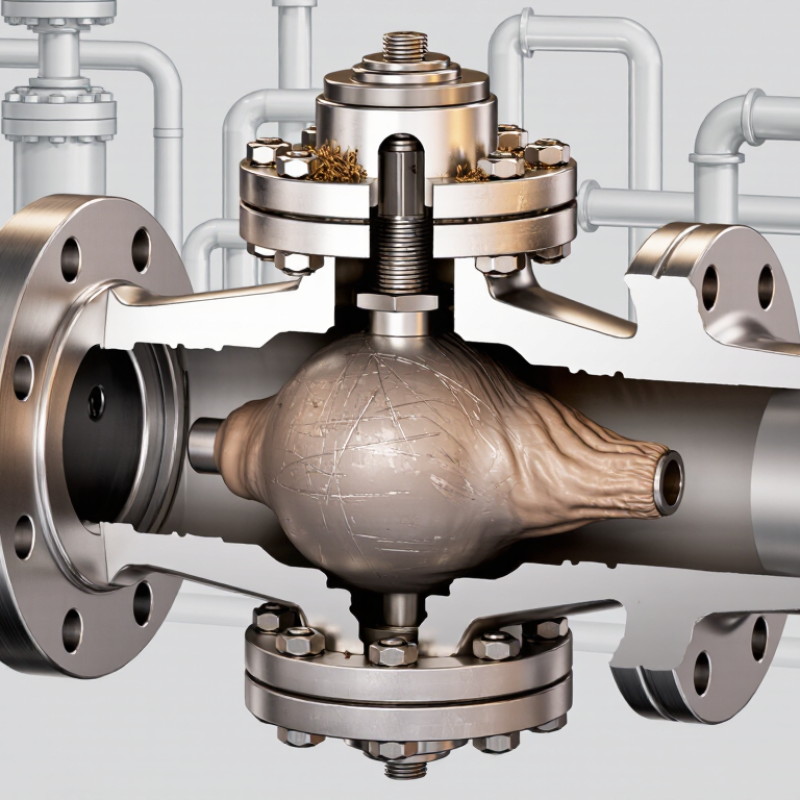
2026 Best Guide What Are the Signs of a Failing Valve Ball Seat?

Time:2026-10-03 Author:Ethan
0%

A failing valve ball seat rarely announces itself with one dramatic event. More often, the evidence appears as a slow leak, rising torque, or unstable process control. That is why the question “what are the signs of a failing valve ball seat” matters during routine inspection, not only after production stops.

Recent maintenance guidance from the Valve Manufacturers Association, Emerson reliability studies, and API 6D and ISO 5208 testing principles point toward the same lesson: leakage, operating force, and repeatability reveal seat condition. Exact failure rates vary by valve design, fluid, pressure, temperature, and cycling frequency. Be careful with simple averages. They can hide the real risk.

Reliability specialist R. Keith Mobley wrote, “The objective of maintenance is to maintain the equipment, not repair it.” That principle fits ball-seat inspection closely. A faint downstream pressure rise may indicate damage before visible leakage appears. A quarter-turn valve may feel unusually stiff. A soft seat can show swelling, cuts, extrusion, or embedded particles. Metal seats may develop scoring, galling, or polished leak paths.

Small clues matter.

Field experience also has limits. A torque increase can reflect actuator problems, packing friction, or process debris—not the seat alone. Confirm the diagnosis with isolation testing, pressure decay measurements, visual inspection, and manufacturer limits. This guide examines practical symptoms, likely causes, and inspection methods, helping maintenance teams separate a failing ball seat from a different valve problem before reliability declines further.

2026 Best Guide What Are the Signs of a Failing Valve Ball Seat?

Understanding the Valve Ball Seat and Its Role in Valve Performance

A valve ball seat is the sealing surface that holds the ball firmly against the valve body. It controls whether fluid stops completely or passes through the intended opening. Even a small defect can affect pressure control, flow stability, and operating safety.

In field inspections, a failing seat often reveals itself through leakage after closure. You may also notice pressure loss, irregular flow, or a valve that requires unusual operating force. Scratches, swelling, cracking, and flattened edges are common physical signs. Heat, abrasive particles, chemical exposure, and excessive pressure can accelerate this damage. The seat material must match the fluid and service temperature.

Listen carefully. A faint hiss downstream may indicate internal leakage. However, noise alone is not proof. Our first assumption can be wrong. Check pressure readings, actuator movement, and nearby connections before removing the valve. I recommend recording the valve position, operating temperature, and pressure during inspection. This evidence helps separate seat failure from actuator or pipe problems.

A reliable inspection also examines the ball surface. A damaged ball can quickly ruin a replacement seat. Clean installation matters too. One trapped metal fragment may create a permanent leak path. Replacement decisions should follow the valve design, service conditions, and qualified maintenance procedures. Small details matter.

Early Warning Signs of a Failing Valve Ball Seat

Early Warning Signs of a Failing Valve Ball Seat

In field inspections, a failing valve ball seat often shows subtle changes before serious leakage appears. A small leak is easy to dismiss. That judgment can be wrong. Watch for pressure loss while the valve remains closed. Unexplained bubbles in a downstream test can also indicate poor sealing. Fluid collecting around the stem or body joint deserves immediate attention, although the seat may not be the only cause.

Operating torque provides another useful warning. A valve that suddenly needs more force may have damaged, swollen, or contaminated seats. A handle that feels unusually loose can suggest reduced contact between the ball and seat. Listen for hissing, especially during isolation tests. Temperature changes across the valve may reveal internal bypassing in liquid or gas service. These signs should be compared with normal operating records, not judged alone.

Inspection experience shows that debris is a common and overlooked factor. Metal particles, scale, or hardened process residue can scratch the sealing surface. Repeated cycling may then enlarge the damage. Before replacing the seat, verify actuator settings, line pressure, and installation alignment. Otherwise, the wrong component may receive blame. Follow the applicable maintenance procedure and use calibrated pressure instruments. Document the leak rate, valve position, media, and temperature. Even incomplete notes can hide a pattern. Safety controls must remain in place when testing pressurized equipment.

Common Causes of Valve Ball Seat Damage and Wear

2026 Best Guide: What Are the Signs of a Failing Valve Ball Seat?

Common Causes of Valve Ball Seat Damage and Wear

A damaged valve ball seat often starts with a small internal leak. During maintenance, technicians may notice scoring, flattened edges, or uneven contact marks. A rough operating handle can also indicate excess friction around the ball. Do not ignore a faint hissing sound. It may reveal pressure bypassing the closed valve.

Abrasive particles are a frequent cause of seat wear. Sand, rust flakes, and welding debris can scratch soft seat materials during cycling. High flow speed can worsen this damage. Chemical incompatibility may cause swelling, cracking, or gradual hardening. Temperature changes create another problem. Repeated heating and cooling can distort the seat and reduce sealing pressure.

Incorrect installation also matters. Misalignment, excessive tightening, or poor cleaning can damage the sealing surface before service begins. Dry operation may create heat and friction, especially when the design requires lubrication or fluid cooling. In field inspections, I have seen clean-looking valves fail because contamination stayed inside the body cavity. That detail is easy to miss. Check pressure records, fluid cleanliness, cycle frequency, and operating temperature together. Compare the seat material with the actual fluid, not only the original specification. A careful inspection should include the ball surface, stem alignment, and nearby seals. Even experienced teams sometimes replace the seat too quickly. The real cause may remain in the pipeline.

Step-by-Step Methods for Inspecting a Valve Ball Seat

A failing valve ball seat often reveals itself through downstream leakage, pressure decay, or unusual operating torque.

Start safely. Isolate the valve, release trapped pressure, and confirm zero energy before inspection.

The U.S. Energy Information Administration reports that unplanned industrial outages can create significant production losses, making early valve checks practical.

Do not treat a quiet valve as a healthy valve.

Remove the actuator when permitted, then cycle the ball slowly by hand.

Look closely. Use a strong light to find scoring, embedded particles, pitting, or flattened soft-seat edges.

Check the stem for side movement and measure operating torque with a calibrated wrench.

A sudden torque increase may indicate contamination or seat deformation. Unusually low torque can suggest poor contact.

That detail is easy to miss.

Perform a controlled shell and closure test using clean, compatible test media.

API 598 defines pressure-test procedures, holding periods, and allowable leakage requirements.

ISO 5208 classifies leakage rates, including rates based on valve size and test method.

Record upstream pressure, downstream pressure, temperature, and test duration.

A pressure drop without visible bubbles still requires investigation.

Thermal expansion, trapped air, or a faulty gauge may distort results.

My field preference is repeating the test after cleaning, because one test can mislead.

Compare the result with the valve’s specification, service history, and previous torque readings.

Replace the seat when damage exceeds the manufacturer’s permitted tolerance.

Repair, Replacement, and Prevention of Future Ball Seat Failure

2026 Best Guide: What Are the Signs of a Failing Valve Ball Seat?

A failing ball seat often shows through leakage, pressure loss, or unstable flow. During operation, listen for hissing near the valve body. Check for downstream pressure when the valve should be closed. Rising torque can also indicate damaged, swollen, or contaminated seat material. API Specification 6D emphasizes pressure testing and functional verification, but field conditions still matter. A clean test result does not guarantee long-term sealing.

Repair depends on the damage. Technicians may remove debris, inspect the ball surface, and replace worn seals. Scratched balls usually require replacement, not polishing in the field. If leakage returns after repair, replacing the complete seat assembly may be safer. The U.S. Department of Energy’s Operations & Maintenance Best Practices guide reports that preventive maintenance can reduce costs by about 12–18% compared with reactive maintenance. That figure is useful, though actual savings vary with service conditions. I have seen maintenance plans fail because inspection intervals looked precise but ignored cycling frequency, temperature, and fluid contamination.

Tips: Record closing torque, leakage rate, cycle count, and fluid temperature. Use calibrated test equipment. Keep replacement seats sealed and traceable. Avoid forcing a stiff actuator. A small pressure trend can reveal trouble early. Prevention is not perfect. It still beats emergency replacement beside a running process line. Review seat compatibility with pressure, temperature, solids, and chemical exposure before approval. Scrap any component with unclear inspection history.

2026 Best Guide: What Are the Signs of a Failing Valve Ball Seat? – Repair, Replacement, and Prevention of Future Ball Seat Failure

Use this field reference to identify common ball-seat failure symptoms, confirm the likely cause, select an appropriate corrective action, and reduce the risk of repeat failure.

Valve ball seat failure signs, diagnosis, repair, replacement, and prevention guide
Failure Sign or Condition Likely Ball-Seat Problem Recommended Checks Typical Severity Repair or Replacement Action Prevention of Future Failure
Valve leaks when fully closed Seat deformation, erosion, embedded debris, or damage to the ball-to-seat sealing surface. Verify the valve is fully closed; inspect downstream pressure; perform a leak test using the applicable plant or industry procedure; check for trapped solids. High Clean the sealing area if contamination is confirmed. Replace the seats when leakage remains or when the sealing lip is cut, worn, or permanently deformed. Install suitable filtration or flushing provisions, keep the line clean during commissioning, and avoid closing the valve against excessive debris.
Visible leakage around the valve body or stem area The symptom may be caused by a body-joint gasket, stem seal, or body-seat cavity issue rather than the ball seat itself. Identify the exact leak path with approved leak-detection methods. Do not assume an external leak is a seat failure. Critical Depressurize and isolate the valve before disassembly. Replace damaged seals or gaskets and inspect the seat and ball for secondary damage. Use correct torque and assembly procedures, verify gasket compatibility, and include external leak checks in routine maintenance.
Valve requires excessive torque to operate Seat swelling, thermal distortion, particulate contamination, corrosion, or excessive differential pressure across the ball. Compare operating torque with the valve specification; check line pressure, temperature, actuator settings, and the valve position before operation. High Do not force the actuator. Isolate the valve, remove contamination if possible, and replace distorted or chemically incompatible seats. Select seat materials for the actual temperature and fluid chemistry; equalize pressure where required before operation.
Valve operates too easily or feels unusually loose Seat wear, loss of preload, damaged support components, or internal looseness. Check operating torque, travel stops, actuator coupling, and any abnormal movement or noise during cycling. Medium Inspect the internal assembly during a planned outage. Replace worn seats and any damaged support or retaining components. Maintain correct seat compression, prevent over-travel, and record torque trends to identify gradual deterioration.
Leakage increases after repeated cycling Progressive seat wear, abrasion, fatigue, or loss of sealing contact caused by frequent operation. Review cycle count, fluid cleanliness, operating speed, pressure differential, and previous maintenance records. Medium Replace seats when the measured leakage exceeds the permitted limit or inspection shows loss of sealing geometry. Use a seat design and material rated for the duty cycle; control cycling speed and avoid unnecessary partial-position operation.
Valve leaks after installation or maintenance Incorrect seat orientation, damaged seat during assembly, foreign material, incorrect tightening, or misalignment. Review assembly records, inspect orientation marks, confirm cleanliness, and repeat the required pressure and functional tests. High Reassemble according to the approved procedure. Replace any seat that has been cut, pinched, scratched, or permanently distorted. Use clean tools, protect soft seats from sharp edges, follow tightening sequences, and complete inspection before pressurization.
Seat shows cuts, scratches, flattening, or missing material Mechanical damage from debris, improper handling, erosion, cavitation-related effects, or incompatible cleaning practices. Inspect the full circumference of the seat and ball under suitable lighting; document damage depth, location, and pattern. High Replace the seat if the sealing surface is damaged. Inspect the ball as well; a damaged ball may require replacement or specialist evaluation. Protect components during handling, remove weld slag and scale before installation, and prevent abrasive particles from entering the valve.
Seat becomes brittle, swollen, soft, or discolored Chemical incompatibility, excessive temperature, rapid decompression, aging, or exposure to an unsuitable cleaning fluid. Compare the seat material with the fluid composition, concentration, temperature, pressure, and decompression conditions. High Replace the seat with a material qualified for the complete service envelope. Investigate the chemical and thermal exposure before returning to service. Confirm material compatibility during specification, monitor process excursions, and follow approved cleaning and decompression procedures.
Pressure drop, turbulence, or abnormal noise near the valve Valve may be partially open, incorrectly positioned, internally damaged, or exposed to cavitation or high-velocity flow. Verify position indication, upstream and downstream pressures, flow rate, vibration, and service conditions. Medium Correct the operating position if appropriate. Inspect the ball and seats for erosion or impact damage during the next safe shutdown. Use ball valves primarily for isolation, not continuous throttling, unless specifically designed and rated for control service.
Seat failure occurs soon after replacement Root cause was not corrected, such as contaminated fluid, incorrect material, excessive pressure differential, misalignment, or poor installation. Compare the new failure with the previous damage pattern; review process data, installation records, and seat material selection. Critical Perform a documented root-cause analysis before installing another seat. Replace associated damaged parts and correct the operating condition. Use failure-history tracking, incoming-part inspection, technician training, commissioning cleanliness checks, and scheduled leak testing.
No visible symptom, but the valve fails a seat leakage test Internal bypass caused by wear, contamination, damaged sealing surfaces, or a seat that has lost elasticity. Confirm test medium, pressure, stabilization time, valve orientation, and test acceptance criteria; repeat the test when required. High Clean and retest only when contamination is suspected and the procedure permits it. Replace the seat if the failure persists. Set a documented inspection interval based on service criticality, cycle frequency, leakage history, and fluid severity.

Safety note: Always isolate, depressurize, drain, and verify zero energy before inspecting or disassembling a valve. Seat replacement should follow the valve’s approved maintenance procedure and the applicable site safety requirements.

FAQS

What are the early signs of a failing valve ball seat?

A small internal leak may appear first. Listen for faint hissing near the valve body. Downstream pressure may remain when the valve is closed. Rising operating torque is another warning.

Which particles commonly damage valve ball seats?

Sand, rust flakes, and welding debris can scratch soft seat surfaces. High flow speeds push particles against the seat. Even a clean-looking valve may contain hidden contamination.

How can chemical exposure affect the seat?

Incompatible fluids may swell, crack, or harden the seat material. Compare the actual fluid with the seat material. Original specifications may not match field conditions.

Can temperature changes cause seat failure?

Repeated heating and cooling can distort the seat. Distortion reduces sealing pressure. Record fluid temperature during operation. Temperature history is easy to overlook.

How does incorrect installation create damage?

Misalignment can produce uneven contact marks. Excessive tightening may deform the sealing surface. Poor cleaning can leave debris inside the valve body. Small mistakes matter.

What should technicians inspect before replacing a damaged seat?

Inspect the ball surface, stem alignment, nearby seals, and body cavity. Check leakage rate, closing torque, cycle count, and fluid cleanliness. Replacing the seat too quickly may leave the real cause untouched.

When should a valve ball seat be repaired or replaced?

Technicians may remove debris and replace worn seals when damage is limited. A scratched ball usually needs replacement. If leakage returns, replacing the complete seat assembly may be safer. Field polishing is not always reliable.

How can future ball seat failures be prevented?

Use calibrated test equipment and record pressure trends. Keep replacement seats sealed and traceable. Do not force a stiff actuator. Review pressure, temperature, solids, and chemical exposure before approval.

Does preventive maintenance always prevent failure?

No maintenance plan is perfect. Inspection intervals should reflect cycling frequency and contamination. A clean test result cannot guarantee long-term sealing. Review the plan when field conditions change.

Conclusion

This guide explains the important role of the valve ball seat in maintaining tight shutoff, smooth operation, and reliable fluid control. It answers the question, “what are the signs of a failing valve ball seat,” by examining common symptoms such as leakage when the valve is closed, unstable flow, increased operating torque, unusual noise, visible wear, and difficulty maintaining pressure. Recognizing these warning signs early can help prevent more serious valve performance problems.

The article also explores common causes of ball seat damage, including abrasive particles, excessive temperature, chemical exposure, improper operation, and normal aging. It presents practical inspection methods, such as checking valve performance, examining seat surfaces, testing for leakage, and reviewing operating conditions. Finally, it outlines when repair or replacement may be appropriate and recommends preventive measures, including proper cleaning, suitable materials, routine inspections, correct installation, and operating the valve within its intended limits.

Ethan

Ethan

Ethan is a seasoned marketing professional with a deep expertise in our company's innovative product line. With a passion for sharing knowledge and insights, he takes the lead in regularly updating our corporate blog, where he explores industry trends, product features, and effective marketing......