How to Install a Replacement Ball in a Three Way Valve?

Time:2026-09-18 Author:Charlotte
0%

Replacing an internal valve part looks simple, until a small alignment error causes leakage, poor flow, or actuator damage. This guide explains how to install a replacement ball in a three-way valve with a careful, practical approach. It is intended for technicians, maintenance staff, and experienced DIY users who can isolate equipment safely. A three-way valve may direct media through different ports, so its ball, stem, seats, and seals must match the original design. Always confirm the valve model, pressure rating, temperature range, and flow pattern before opening it. The manufacturer’s service manual remains the most reliable reference. Do not guess.

You will learn how to shut down and depressurize the system, remove the actuator or handle, inspect worn seats, and position the new ball correctly. Clean tools matter. So does good lighting. A flashlight can reveal scoring around the seat or debris inside the valve body. Replacement parts should be genuine or verified equivalents, not merely similar-looking components. After assembly, tighten fasteners evenly and test the valve gradually for external leakage and correct port selection. A pressure test may be required by site procedures. Stop if the stem binds, the body distorts, or the ball fails to rotate smoothly. One limitation matters: valve designs differ, and a generic sequence cannot replace model-specific instructions. Even experienced technicians can miss a damaged seat. Careful inspection is part of the repair, not an optional extra. Done properly, this process supports dependable service and helps prevent avoidable downtime.
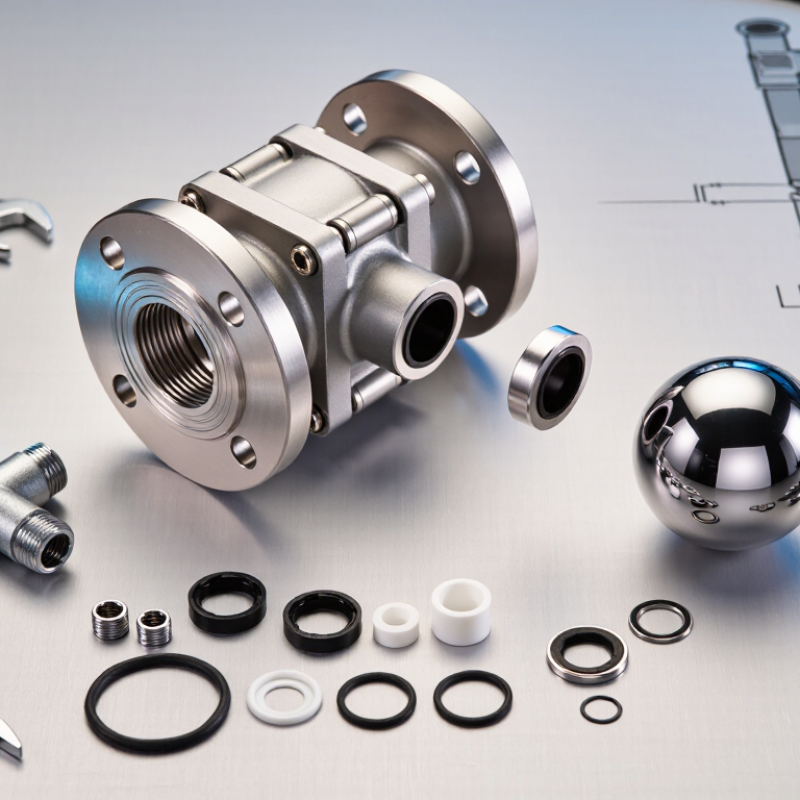
How to Install a Replacement Ball in a Three Way Valve?

Identify the Three-Way Valve Type and Replacement Ball

Before installing a replacement ball, identify the three-way valve’s internal flow pattern. A T-port ball can connect several passages, while an L-port ball usually transfers flow between two selected ports. Mixing and diverting valves may look identical outside, yet their control duties differ. Check the valve body arrow, port labels, actuator position, and the old ball’s bore shape. Do not trust appearance alone.

The replacement ball must match the body size, stem interface, seat design, pressure class, temperature range, and flow direction. Record the port positions with the handle removed. A simple sketch helps. ISO 5211 guidance supports accurate actuator and stem alignment, but it does not confirm the ball’s flow pattern. The 2023 International Energy Agency Energy Efficiency report states that buildings consume about 30% of global final energy. Correct valve selection therefore matters in real operating costs, especially in hydronic systems. The U.S. Energy Information Administration’s 2018 CBECS data also identifies space heating as roughly 32% of commercial site energy use.

Isolate the line and release pressure before opening the valve. Inspect the seats for scoring, grit, or uneven compression. A new ball can fail quickly against damaged seats. In field work, I have seen installers reverse an L-port ball because the handle position seemed logical. It was not. Verify every quarter-turn against the required flow diagram. Check for leakage at low pressure, then test the actuator through its full travel. I still prefer a second-person review; one overlooked port can waste an entire service call.

Gather Tools and Shut Off the System Safely

Before installing a replacement ball in a three-way valve, prepare every tool within reach. You may need an adjustable wrench, socket set, seal pick, soft cloth, drain pan, flashlight, marker, and replacement seals. Wear safety glasses and gloves suited to the system fluid. Check the replacement ball against the old part. Confirm its size, port pattern, material, and stem alignment. Do not assume a similar-looking part will fit correctly.

Keep the floor dry. A clean work area prevents dropped parts from collecting dirt. Read the valve’s service instructions before loosening any connection. Mark each pipe and photograph the handle position. This small step can prevent incorrect reassembly, especially when all three ports look identical. It is easy to rush here. That is a mistake worth noticing.

Shut off the system’s power source and isolate the valve from connected equipment. Close upstream and downstream isolation valves, if fitted. Lock or label the controls so nobody restores service accidentally. Open the correct drain slowly, then watch the pressure gauge until it reaches zero. Verify that no flow, heat, or stored pressure remains. Test, then test again. If pressure stays present, stop and investigate instead of forcing a fitting. Allow hot systems to cool fully. For fluid lines with special hazards, follow the site’s safety procedure and use suitable containment before opening the valve.

Disassemble the Valve and Remove the Worn Ball

How to Install a Replacement Ball in a Three Way Valve?

Disassemble the Valve and Remove the Worn Ball

Isolate the valve completely before disassembly. Close upstream and downstream lines, lock the controls, and release trapped pressure. Drain the cavity into a suitable container. Never trust the handle position alone. A three-way valve may retain pressure in one port.

Mark the handle, stem, body, and flow direction with a paint pen. This small step prevents incorrect reassembly. Remove the actuator or handle, then loosen the gland hardware and body bolts evenly. Keep the bolts grouped by position. Separate the body carefully without striking the sealing faces. Lift out the worn ball using clean gloves. Avoid screwdrivers on the polished surface. One careless scratch can create a permanent leak path.

Inspect the ball, seats, stem, and cavity for scoring, corrosion, or embedded debris. Replace damaged seats rather than forcing a new ball into an old sealing system. The U.S. Department of Energy’s Improving Compressed Air System Performance sourcebook reports that leaks can waste 20–30% of compressor output. That figure is not valve-specific, but it shows why small defects deserve attention. ISO 5208 pressure-testing guidance also supports checking closure performance after maintenance. Cleanliness matters most. A rushed wipe is not enough. In field work, marking the stem after removal is often forgotten, and that mistake can reverse the intended flow pattern.

How to Install a Replacement Ball in a Three Way Valve? - Disassemble the Valve and Remove the Worn Ball

Step Procedure Stage Required Action Inspection or Measurement Point Expected Result
1 Isolate the valve Close the upstream and downstream shutoff valves. If the valve is installed in a pressurized system, isolate all connected flow paths. Confirm that the system pressure has fallen to zero using a suitable pressure gauge or approved test point. No pressure, flow, or stored energy remains around the valve.
2 Drain and clean the work area Open the designated drain or vent point and collect any remaining fluid in an appropriate container. Wipe dirt from the valve exterior. Check for liquid discharge, chemical residue, and contamination around the body joint. The valve is dry enough to disassemble safely and foreign material cannot enter the body.
3 Record valve orientation Mark the handle position and note the port arrangement before removing the actuator or handle. Identify whether the internal ball uses an L-port or T-port flow pattern. The replacement ball can be installed in the same orientation as the original.
4 Remove the handle or actuator Remove the retaining nut, screw, clip, or other approved fastener. Lift the handle or actuator straight from the stem without prying against the valve body. Inspect the stem, key, flats, and retaining hardware for rounding, cracks, or corrosion. The stem remains undamaged and its position is clearly identified.
5 Disassemble the valve body Loosen the body bolts, threaded end connection, or retaining cover using the correct tool. Support the valve so that connected piping is not carrying the disassembly load. Check bolt condition, thread engagement, gasket location, and the original assembly order. The body separates without distortion, and all parts are kept in their correct sequence.
6 Remove the worn ball Carefully lift the ball from the valve cavity. Use a non-metallic tool if the ball is stuck; do not scratch the sealing surfaces. Inspect the ball for scoring, pitting, erosion, deposits, and damaged port edges. The worn ball is removed without damaging the body, stem slot, or seat pockets.
7 Inspect seats and seals Remove the valve seats, stem seals, thrust washers, and body gasket if the construction requires replacement during service. Look for flattened seats, cuts, swelling, permanent deformation, cracks, or chemical attack. Compare replacement parts with the removed parts by size and shape. All sealing components are suitable for the valve size, fluid, temperature, and pressure service.
8 Clean the internal parts Clean the body cavity, stem bore, and sealing grooves with a lint-free cloth and a cleaning method compatible with the process fluid and valve materials. Ensure that no metal chips, seal fragments, scale, or abrasive particles remain. All contact surfaces are clean, smooth, and free from debris.
9 Install the replacement seats Place the new seats in their original pockets. Make sure each seat is fully supported and not twisted or folded. Verify that the seat faces are aligned with the ball path and that no edge protrudes into the wrong position. The seats are evenly positioned and ready to support the replacement ball.
10 Install the replacement ball Apply only a compatible lubricant where permitted, then lower the ball into the valve body. Align the ball ports with the orientation marks recorded earlier. Confirm that the stem slot engages correctly and that the ball rotates without binding. The ball turns through its normal quarter-turn operating range and maintains the correct L-port or T-port alignment.
11 Reassemble the valve Replace the body gasket and stem seals when required. Refit the body parts and tighten fasteners gradually in an alternating or cross-pattern sequence. Use the valve manufacturer’s specified tightening values; do not guess torque values because they vary by size, material, and design. The body is evenly closed without visible gaps, distortion, or pinched seals.
12 Reinstall the handle or actuator Set the handle or actuator to the recorded position and secure it with the original retaining hardware or approved replacement hardware. Operate the mechanism slowly through each permitted position and check the port indication. The operating position corresponds correctly with the internal ball ports.
13 Perform a leak and function test Pressurize the valve gradually with a compatible test medium. Check the body joint, stem area, end connections, and all selected flow paths. Inspect for external leakage, abnormal operating resistance, incomplete shutoff, and incorrect flow direction. The valve operates smoothly and passes the applicable site or maintenance leak-test requirements.
14 Return the valve to service Restore normal system connections, remove temporary drain equipment, and verify that all fasteners and covers are secure. Record the service date, valve location, replacement parts, test result, and any observed operating condition. The valve is documented, correctly positioned, and ready for controlled operation.
Safety note: Replacement procedures must follow the valve’s specific maintenance instructions, pressure class, material compatibility requirements, and applicable workplace safety rules. Never disassemble a valve until the line has been fully isolated, depressurized, drained, and made safe.

Install the Replacement Ball and Reassemble the Valve

How to Install a Replacement Ball in a Three Way Valve?

Before installing the replacement ball, shut off the supply and release all internal pressure. Drain the valve completely. Even a small amount of trapped water can make the work messy. Remove the actuator or handle, then loosen the valve body carefully. Keep each screw and washer in a clean tray. Compare the new ball with the old one. Its openings must match the original flow pattern and port positions.

Clean the valve cavity with a lint-free cloth. Check the seats, seals, and stem for cuts, cracking, or unusual wear. Replace damaged seals instead of reusing them. Apply a thin layer of compatible valve lubricant. Too much lubricant may collect dust or affect sealing. Place the replacement ball inside the body, aligning its openings with the correct ports. Refit the stem and handle without forcing them. Tighten the body screws gradually in a cross pattern. I have learned that a quick visual check is not enough; the handle should move smoothly through every position.

Tips: Mark the original handle position before disassembly. Take a clear photo of the port alignment. After reassembly, open the supply slowly and inspect every joint with a dry cloth. Test each flow direction separately. If the ball binds, stop and check alignment rather than adding force. A minor mistake here can damage the seal.

How to Install a Replacement Ball in a Three-Way Valve?

Install the replacement ball and reassemble the valve by completing each verification step before returning the valve to service.

Checklist: Confirm that the valve body is clean, the seats and seals are correctly positioned, the ball port matches the required flow path, the stem engages the ball, and the assembled valve passes a leak and function check. Always follow the valve manufacturer’s torque and pressure specifications.

Test Valve Operation and Check for Leaks

After installing a replacement ball in a three-way valve, restore pressure slowly. Keep your hands clear of joints and outlets. Turn the handle through each position without forcing it. The movement should feel smooth, with clear stops and no scraping sound. I usually test every flow path separately, because one position can work while another remains blocked. Check the connected equipment too. A quiet valve is not always a sealed valve.

Tips: Use a dry cloth around each connection. Inspect it after several minutes. Any wet ring, odor, pressure drop, or hissing sound requires immediate attention. For threaded joints, verify proper tightening without excessive force. Over-tightening can damage threads or distort the seal. If the valve uses an actuator, confirm that its indicator matches the actual flow direction. Labels can be misleading after maintenance.

Repeat the test at normal operating pressure, then observe the valve for several minutes. If possible, compare the pressure before and after the valve. Unusual vibration may indicate incorrect ball alignment, trapped debris, or a damaged seat. I have learned that rushing this check creates false confidence. A valve may appear dry during a quick inspection, yet leak after repeated movement. Isolate the system before correcting any problem, release stored pressure safely, and replace questionable seals rather than hiding them with extra tightening. Record the test position, pressure, and inspection time for reliable future maintenance.

FAQS

What tools are needed to replace the ball in a three-way valve?

Prepare an adjustable wrench, socket set, seal pick, soft cloth, drain pan, flashlight, marker, and replacement seals.

How can I confirm that the replacement ball fits?

Compare its size, port pattern, material, and stem alignment with the old ball.

How should the valve be isolated before disassembly?

Shut off the power source and close upstream and downstream isolation valves.

What should I do if pressure remains in the valve?

Stop immediately and investigate the isolation points.

How can I remove the worn ball without damaging the valve?

Mark the handle, stem, body, and flow direction before removing parts.

Which parts should be inspected during replacement?

Inspect the ball, seats, stem, cavity, and sealing faces for scoring, corrosion, or debris.

How should the valve be tested after installing the replacement ball?

Restore pressure slowly and keep hands away from joints and outlets.

How can I find leaks after maintenance?

Wrap a dry cloth around each connection and inspect it after several minutes.

What should I do if the valve leaks or operates incorrectly?

Isolate the system again and release stored pressure safely before making corrections.

Conclusion

This guide explains how to install a replacement ball in a three-way valve safely and effectively. Begin by identifying the valve configuration and confirming that the replacement ball matches its size, material, port arrangement, and operating requirements. Gather suitable hand tools, replacement seals if needed, and protective equipment. Before opening the valve, shut down the system, isolate the valve from pressure, and drain or relieve any trapped fluid according to the system’s safety procedures.

Next, carefully disassemble the valve, keeping track of the order and orientation of each component. Remove the worn ball and inspect the valve body, stem, seats, and seals for damage or debris. Install the replacement ball in the correct position, replace worn seals, and reassemble the valve evenly without overtightening. After installation, restore the system gradually and operate the valve through all three positions. Check for smooth movement, correct flow direction, and any signs of leakage around the body, stem, and connections.

Charlotte

Charlotte

Charlotte is a seasoned marketing professional with a deep understanding of the company's portfolio and a passion for elevating its presence in the market. With a keen eye for detail and a commitment to excellence, she ensures that our professional blog is regularly updated with insightful articles......